There are a number of Scrum activities where having Stories on paper is much more productive. So in this article I’ll cover:
- How can you export Stories from JIRA Agile ?
- How can you print Stories on to paper cards using a Word mail merge ?
How To Print Story Cards from JIRA Agile
A number of Scrum activities like estimating, planning and ranking exercises can be done much faster and more effectively with your Scrum teams using good old fashioned paper Story Cards. A hard copy of your Stories on individual cards that can be physically moved around and organized on boards and walls will be faster, easier and more intuitive and collaborative for some Scrum activities.
 But if you are using JIRA Agile as your on line Scrum tool, it doesn’t provide a built in way to print Story Cards. Or for that matter, print most anything in a well formatted hard copy version. JIRA is designed as an online tool, and so they haven’t designed in features that are well suited to printing out info on to paper. For example supporting options like pagination, headers and footers, paper sizes, repeating column headings at the top of each page for tables that span more than 1 page, etc.
JIRA Agile does, however, have some great query and fairly decent exporting capabilities. The easiest way that I’ve found to get Story Cards out of JIRA and have total flexibility on how it is laid out and formatted on paper, is to export to Excel and mail merge that into a Word document.
So here is the step by step details on how to do that.
Formatting Conventions
In the step by step instructions below I use the following formatting conventions.
Bold underlined text = Text links, menus and other items that display on the page that are clickable.
Italic text = Text that displays on the page, but is not clickable.
Software Used in this Article
- JIRA self hosted version 6.3.7
- Microsoft Word for Mac 2011
- Microsoft Excel for Mac 2011
How To Export Stories from JIRA Agile
First you need a query that extracts the issues that you want to print.
You can access JIRA’s search page via the Issues > Search for Issues JIRA menu command.
Learn the JIRA Query Basics
If you not familiar with querying JIRA then check out the JIRA docs on these subjects:
JQL uses some SQL-like syntax so if you’re familiar with SQL, then using JQL will be easier for you to learn to use. You’ll just need to understand how JIRA projects and fields work.
Sample Query for Product Backlog
If you want to query your Product Backlog, here is the JQL you might use:
Project = PROJKEY AND Type = Story AND Sprint IS NULL AND Status != Done ORDER BY rank ASC
Here is a breakdown of this JQL.
Project = PROJKEY
Selects your project only using project key.
A best practice with JIRA is to query and filter based on project key and not project name. Project names can and will probably change. Names are easily changeable by project admins and are intended to be more descriptive and wordy, so there are subject to change. Project keys, by contrast will rarely change because changing keys is not a trivial task. They are part of the issue keys and URLs, and can only be changed by a JIRA System Administrator.
More details on:
Type = Story
Selects the issue type Story. Set this differently if your project is using a different issue type. And add more if you need multiple issues types.
Sprint IS NULL
Selects issues that have never been planned in a Sprint. If however, some of your issues were planned in a Sprint and then removed from it, this field will have a value in it, and you will have to adjust the JQL to select all of the issues you need.
Status != Done
Selects issues that are not done. Status is the workflow status. Done must be the end workflow state that is used in your project’s workflow.
ORDER BY Key ASC
This sorts the resulting query by issue key.
2. Export from JIRA
From the JIRA Search page:
1. Select the columns you what in your mail merge. For example the Word mail merge files downloadable from this article below, can use the fields: Key, Epic Link & Summary.
 |
| JIRA Exporting – Select Columns |
2. Select Export > Excel (Current Fields).
More details on:
3. Clean up the Excel file
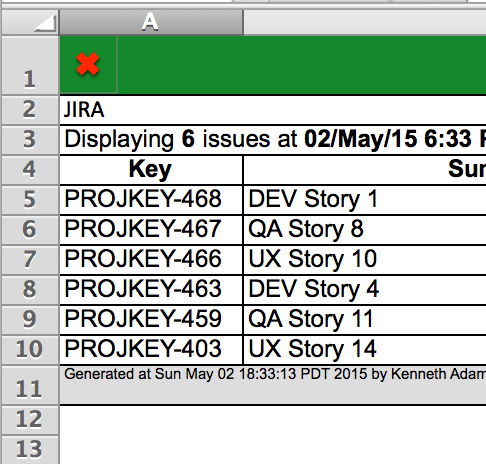
The Excel file that JIRA exports is a bit of a mess and needs to be cleaned up before it can be used as a data source for a Word mail merge.
1. Open the exported Excel file. It will be in XLS format. You’ll need to delete the junk rows at the top and bottom of the spreadsheet, that JIRA has added to the Excel file. The top rows specifically will prevent Word mail merge from recognizing the Excel file as a data source.
2. In the screen shot below, you would delete rows 1-3, and the bottom row 11.
 |
| Clean up the Excel File |
3. Now use File > Save As to save the new file as a XLSX. I’ve have had Word for Mac encounter intermittent bugs with some JIRA exports in XLS, that worked once I saved it as an XLSX. Also XLSX is often much smaller in size, faster to load, and is a more modern file format than the XLS that JIRA exports.
Sample Excel Files of JIRA Exports
Simulated file as it might be exported from JIRA.
The cleaned up XLSX version of the same data.
How To Print Stories on Cards using a Mail Merge
How is the Mail Merge designed ?
This Word mail merge is designed to be printed to 8.5” x 11” paper and cut into 4 pieces. The Word DOCX has dashed lines that print on it, as guides for cutting with a paper cutter or scissors. I suggest a paper cutter for speed and easy.
Word Mail Merge documents
Word mail merge that prints the issue Key, Summary and Epic Link fields. If you are using Epics, which I strongly suggest that you do, then printing the Epic on the cards can be helpful for the team when using them for estimating and planning exercises.
PDF of the print results of the above mail merge.
Word mail merge that prints the issue Key and Summary fields only, without the Epic Link.
How to Use the Mail Merge
1. Open the Word DOCX file. It will automatically open a Mail Merge Manager dialog like the ones shown in the screen shots below. If it is closed you can open it again on Word for Mac with the Tools > Mail Merge Manager menu command.
The DOCX will also attempt to open the last Excel file it used as a data source. If it cannot find it, you can select a new data source, similar to the next step.
2. Select a new data source in the Mail Merge Manager in the section titled 2. Select Recipients List. Click the Get List button and select Open Data Source. As shown in the screen shot below.
 |
| Word Mail Merge – Select Data Source |
3. Click OK in the following dialog box to confirm opening the Excel file.
 |
| Word Mail Merge – Confirm File Open |
4. Click OK in the next dialog box titled Open Workbook.
 |
| Word Mail Merge – Open Workbook |
5. To execute the mail merge, in the Mail Merge Manager in the section titled 6. Comlete Merge. Click the Merge to Printer button.
You will the get a normal Print dialog. See the example PDF file attached above showing a merge printed to a PDF file.
 |
| Word Mail Merge – Merge to Printer |
I use this process constantly running estimating and planning sessions with Scrum teams. I hope you find this as useful as I do.
If you do, add a comment. If you have any suggestions for improvements, add a comment.
Related


 But if you are using JIRA Agile as your on line Scrum tool, it doesn’t provide a built in way to print Story Cards. Or for that matter, print most anything in a well formatted hard copy version. JIRA is designed as an online tool, and so they haven’t designed in features that are well suited to printing out info on to paper. For example supporting options like pagination, headers and footers, paper sizes, repeating column headings at the top of each page for tables that span more than 1 page, etc.